
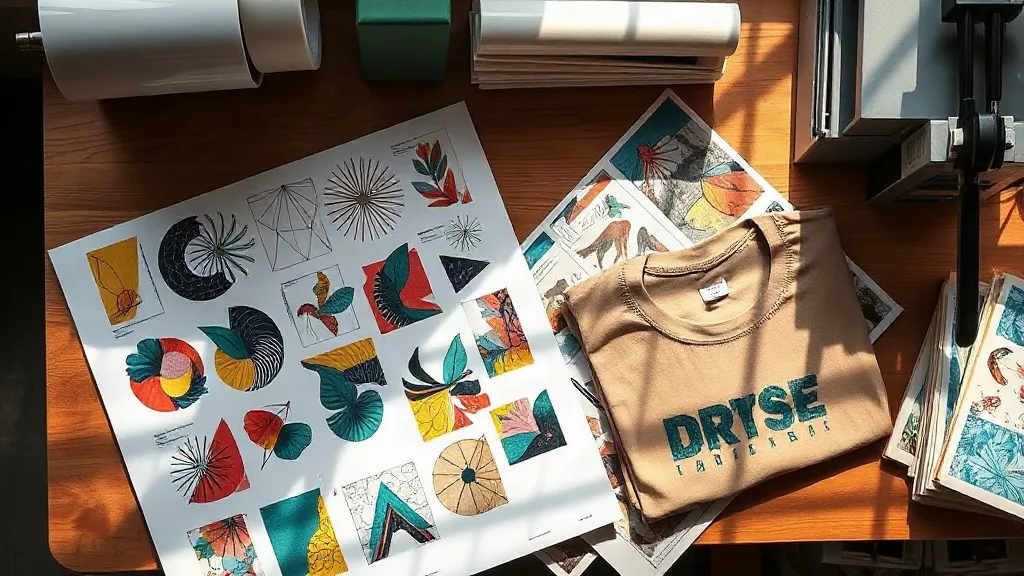
Most print shops lose money in the same quiet places: a misaligned transfer, a shirt pressed twice because the first peel went wrong, a gang sheet with three inches of wasted film at the bottom. None of these mistakes look dramatic on their own. Stack them across a hundred orders and the margin disappears. That is why the pairing of shaka wear blanks with a well-planned DTF sheet deserves more attention than it usually gets. One side of that pairing is the garment, the other is the transfer layout, and the workflow between them decides whether a small operation stays profitable.
This guide walks through that workflow in the order a real job moves: choosing a blank, building the sheet, pressing it, and checking the numbers afterward. It is written for the person running a heat press in a garage or a two-person shop, not for a factory floor.
Why the Blank Choice Comes Before the Artwork
DTF transfers are forgiving, but they are not magic. The film adheres to the fabric surface, so the surface matters. A heavyweight cotton tee with a tight knit holds a transfer cleanly, while a loose, slubby knit can let the adhesive sink into gaps and produce a cracked edge after a few washes.
This is where shaka wear earns its place in a lot of small-shop rotations. The line leans toward heavier cotton and streetwear-friendly cuts, and heavier fabric gives the press operator a flatter, more stable surface to work with. A 6 oz tee simply behaves better under pressure than a thin 4 oz blank, because there is less chance the shirt shifts and less chance the heat pushes the adhesive through to the back panel.
What to Check on a New Blank Before You Print
- Fabric weight and knit tightness: run a fingernail across the surface. If fibers lift easily, expect texture to show through the transfer.
- Shrinkage: pre-wash one sample before committing a full run, especially for cotton-heavy styles.
- Color consistency between dye lots: order the full quantity for a job at once rather than restocking mid-run.
- Seams and side panels: transfers placed over a thick side seam will not bond evenly, so keep artwork inside the flat front area.
A five-minute check on a single sample saves a whole batch. Shops that skip it usually learn the lesson on a rush order with no time to reorder.
Building a Gang Sheet That Actually Saves Money
The economics of DTF depend on how much of each sheet you fill. Film and powder are paid for by area, so empty space is money thrown away. A DTF Gangsheet Builder turns this from guesswork into a layout task: you upload artwork, drag designs onto a sheet of a chosen size, and see the fill rate before anything is printed.
Two habits make that tool pay off. First, group jobs by deadline rather than by customer. If three clients all need shirts by Friday, their designs belong on the same sheet. Second, keep a small library of filler designs, size tags, or pocket logos that can slot into leftover gaps. Those gaps cost you nothing extra once the sheet is already being printed.
A Simple Sheet Planning Routine
- Collect every design due in the next five days and note the print size for each.
- Sort by size, largest first, and place big designs along one edge to leave a clean block of space.
- Fill remaining areas with smaller repeats, neck labels, or sleeve prints.
- Leave a small margin at the edges, since transfers cut too close to the film border are hard to peel cleanly.
- Save the layout file with the order date so a reprint can be matched exactly.
The DTF Gangsheet Builder also helps with consistency across repeat orders. When a client reorders the same design six weeks later, reopening the saved layout removes any question about whether the size changed slightly.
Pressing Settings That Hold Up After Washing
Durability complaints almost always trace back to pressing, not to the film. The three variables are temperature, pressure, and time, and each one has a failure mode.
Too cool and the adhesive never fully activates, so the transfer lifts at the corners after two washes. Too hot and the adhesive over-cures or the fabric scorches, which is a particular risk on darker poly blends. Too much pressure squeezes the adhesive out past the design edge and leaves a visible halo. Too little pressure and the film does not make full contact, which shows up as patchy bonding under the ink.
A reasonable starting point for cotton-heavy blanks like shaka wear tees is around 150 to 160 degrees Celsius for 10 to 15 seconds on the initial press, followed by a short second press after the film is peeled. Treat those numbers as a starting line, not a rule. Every press runs a few degrees off its display, so test with a temperature gun and adjust from there.
The Peel and Second Press
Most DTF film today is a cold or warm peel, but the exact timing depends on the supplier. Peeling too early while the adhesive is still fluid can stretch the design. Peeling too late can cause the film to grab the ink and pull detail out of fine lines. Once peeled, a second press of five to eight seconds with a cover sheet protects the print and settles the adhesive into the fabric.
Matching the Shirt to the Design
Not every design suits every blank, and this is where a print shop can add real value for clients rather than just taking orders. A dense, full-color transfer on a heavyweight tee looks substantial and holds shape. The same transfer on a lightweight shirt can feel stiff because the ink layer outweighs the fabric.
- Large front prints: heavier cotton, tighter knit, minimal stretch.
- Small chest logos: almost any blank works, but check that the placement is level with the wearer's arm crease.
- Back prints with fine text: test a sample, because small lettering is where poor adhesion shows first.
- Stretch fabrics: expect some cracking over time no matter what, so set client expectations upfront.
Being honest about that last point builds trust. A shop that says "this will crack slightly after twenty washes, and here is why" keeps clients longer than one that promises a print will last forever.
Doing the Cost Math Before You Quote
Pricing DTF work by gut feeling is how shops end up busy and broke. A quick per-unit calculation fixes that. Add the blank cost, the film area used by the design, a share of the powder and ink, and a few minutes of labor. Then compare it to what you charge.
Two numbers are worth tracking in a simple spreadsheet: film utilization per sheet, and reprint rate. If utilization sits below roughly 70 percent, your sheet layouts are leaking money. If reprints climb above a few percent, the problem is usually pressing rather than printing, and a short training session on the heat press solves more than buying new equipment will.
Where This Workflow Pays Off
The shops that run leanest are not the ones with the biggest machines. They are the ones that standardize the small decisions: a preferred blank they know presses well, a saved sheet layout for repeat jobs, and a press setting written on a card taped to the wall. Pairing a dependable heavyweight blank with disciplined gang sheet planning gives a small operation the kind of consistency that larger competitors struggle to match on short runs.
If you are setting up this workflow for the first time, start with one style of blank and one sheet size. Get the press settings dialed in on that combination, then expand. The savings come from repetition, and repetition only works when the variables stay fixed.
Frequently Asked Questions
Can you press DTF transfers onto heavyweight cotton without pre-treating the shirt?
Yes. DTF does not require a pretreatment spray the way DTG printing does. A quick lint roll before pressing is enough to remove dust and fibers that could interfere with adhesion.
How many designs fit on a standard DTF gang sheet?
It depends entirely on the print sizes. A sheet holds roughly a fixed area, so ten small chest logos might fit where only two large back prints would. Plan by total area and leave a small border around the edge for clean cutting.
Why does a DTF print crack after washing even when the press settings looked correct?
The usual culprits are uneven pressure across the platen, peeling the film too early, or skipping the second press. Stretch in the fabric also plays a role, especially on blends with elastane. Check pressure first with a simple test print in each corner of the platen.
Is it cheaper to order gang sheets printed or to print them in house?
For low volume, ordering printed sheets usually wins because you avoid the equipment cost and maintenance. Once monthly volume grows past a certain point, an in-house printer starts to make sense, but the break-even depends on your film and ink prices, so run the numbers with your own figures.